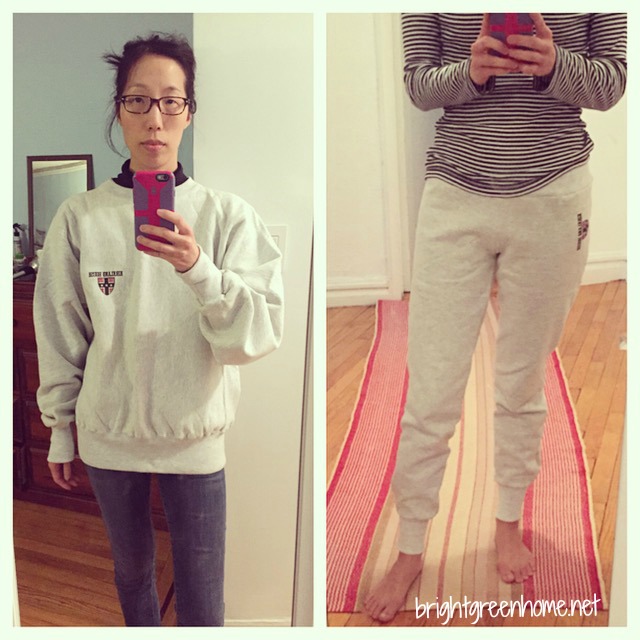
On Saturday I got it into my head to make some skinny sweatpants out of a ginormous sweatshirt I hadn’t worn since college. It took me three hours of measuring, cutting, sewing, swearing, ripping out, and sewing some more, but I was pretty pleased with the result.
On Sunday I Instagrammed the before-and-after pics with a not-at-all-humble-just-straight-up-bragging caption.
On Monday I happened to mention my feat to the style director for All You, one of the magazines I work for when not fighting crime in my secret identity as a green blogger. She asked me to send her the pics and promptly went bananas for them.
On Tuesday, she pitched my pants feat to our digital team, who asked me to blog about the project.
On Wednesday, I finally got my act together and did it, and the post, DIY Fashion: How I Turned an Old Sweatshirt Into New Sweatpants, is now live! I’m thrilled that my coworkers, DIY and crafting and money-saving pros, thought this project was worthy of featuring.
A few additional notes that I didn’t include in the All You post for the sake of streamlining, but that might be helpful to anyone who actually wants to attempt this refashion:
1. If there’s even the slightest chance that your before shot will be featured on the website of a major national brand, maybe brush your hair and put on a little makeup before taking it, hm? 😉
2. I cut off the lower band of the sweatshirt first, before making any other cuts, so as not to accidentally cut through it while cutting the other pieces, since I needed it for my waistband.
3. When tracing my pattern pants onto the sleeves of the sweatshirt, I lined up the inseam of the pants with the top (shoulder side) fold of each sleeve, so the curve of the neckline followed the curve of the crotch on the pants. (It sounds confusing, I know—I wish I had taken some process pictures—but when you lay your pants on the sweatshirt you’ll see how they fit together.) That let me go all the way to the center of the sweatshirt for each leg piece.
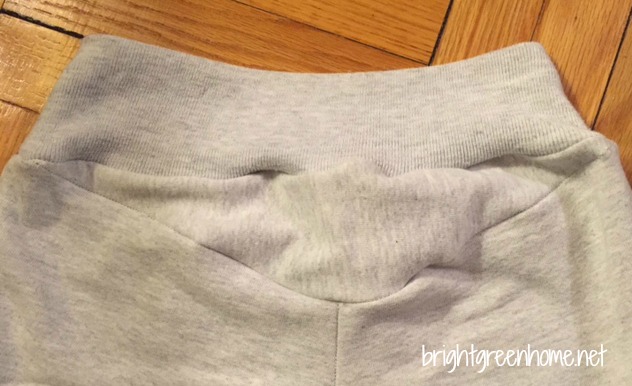
4. Even using the entire width of the sweatshirt, each leg piece was still a little shorter in the rise than my pattern pants. That didn’t really matter in front; since I was adding such a wide waistband, I knew it would make up the difference. But when I tried the pants on before adding the waistband, I could tell that I needed a bit more coverage in the back. (Pants always have a little extra fabric in the back, for obvious reasons.) So I cut a wide triangular shape from the remaining scraps of sweatshirt and sewed it to the back of the pants, like this:
5. My waistband was smaller than the top of the pants, so I had to pin it a lot and stretch it as I pinned and as I sewed, to get it to line up evenly. That was fine, just a little time consuming. Except that I pinned and sewed it on backwards and had to rip it out and redo the whole thing. ARGH. Pin the waistband to the OUTSIDE of the pants.
6. The waist is still a little loose, I think because the band was so stretched out to begin with that it isn’t really strong enough to hold the pants up. I may add a drawstring or extra elastic so that I can wear the pants out of the house without them falling down. My current plan is to sew a 1″ casing along the top of the waistband, then snip a hole and thread through some 3/4″ elastic. A drawstring would look cute but I don’t have anything handy to use as the drawstring and I do have a lot of no-roll elastic lying around, so the free option wins.
I hope this isn’t too confusing! It’s a pretty forgiving project fit-wise, so as long as you have a decent idea of how the pieces of a pair of pants fit together, it’s very doable. Really!